Thursday, October 23, 2014

Preserving Fresh Milk ~ Reviewed and Updated August 9, 2024


Canning fresh milk is something I have done with success for a number of years but before you get too excited about canning milk, I must warn you that the USDA does not recommend it.   Some sources, such as  Perky Prepping Grandma,  feel that pressure-canned milk is safe.  She does not advocate the water bath method of canning milk, however.   

In spite of these warnings, there are some family cow owners, including myself,  who still can their milk in a hot water bath canner.   

For over thirty years, I have looked to Carla Emery's book THE ENCYCLOPEDIA OF COUNTRY LIVING as a guide in my quest for homesteading and farming information. The following is a summary of  Carla's recipe for hot water bath canning and includes my personal notes:

*Wash and sterilize your quart jars.  (I sterilize by placing my clean jars in a canner of boiling water, allowing the jars to boil for at least ten minutes.) 

*Fill your clean, sterilized jars with fresh milk from the cow after straining, leaving about one-half an inch of head space. (You don't want to pour cold milk into hot jars or the jars will break.   Using fresh, warm milk straight from the cow is ideal if your jars are still hot from being sterilized, or you can heat your milk to at least 100 degrees, before pouring it into your hot jars.)

*Wipe rims clean and place lids and rings on jars.  Screw down to finger-tight only.

*Place jars in a hot water bath canner.  Jars should be submerged about an inch under the water.  

*Heat to a gentle, rolling boil and then process for 60 minutes.  Make sure the water is boiling before you start your processing time.  

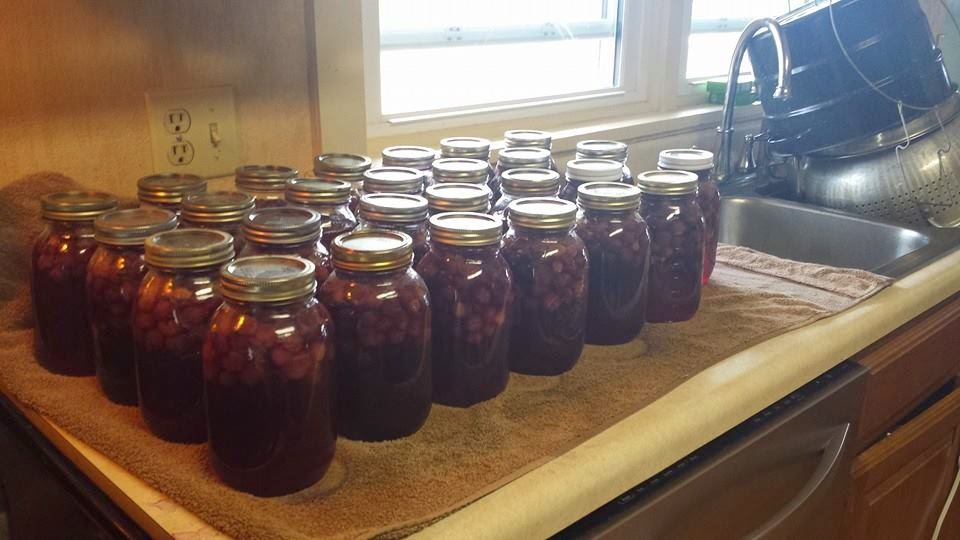
*Carefully remove hot jars from the boiling water bath and allow them to cool.   Make sure they have all sealed before storing them.  Date your jars so that you know how long they have been stored.  Six-month shelf life is recommended, but I have used them up to two years later.    

Many of the people I know who use the hot water bath method process their milk for three hours.  At one time this was the USDA's recommendation for processing proteins (such as meat).   Because I trusted and followed Carla Emory's guide to canning milk and did not know about the three-hour recommendation,  boiling for only 60 minutes is the way I have always proceeded.  Individuals will have to make their own decisions on what they consider safe. 

I did try the pressure canning method of processing milk one time and I didn't care for the results but many people concerned about the hot water bath method feel comfortable with pressure canning milk and it is an option.   The recommendations I have seen say to pressure can quart jars for 15 minutes at ten pounds of pressure.  

Note:

In the spring of 2023, I processed milk using the hot water bath method as described above and used room temperature jars and COLD milk instead of hot jars and hot milk.  I poured the cold milk into sterile jars, wiped the rims, added the rings and lids, and placed the jars in the hot water bath canner in COLD water.  I then heated the canner to boiling and began my processing time of 60 minutes.  The jars of canned milk turned out beautiful and sealed perfectly.  In July of 2023, when we began using milk canned in this manner, we found the flavor to be very close to fresh milk instead of the evaporated milk taste that had been our experience previously.  Pre-sterilized room temperature jars, cold milk, and cold water in the canner to start will be my preferred method of canning from now on.  


Another way to preserve milk is to store it in the freezer.  Frozen milk is best used within six months before it begins to get a freezer-burned taste.  A lot of people are put off by the texture of frozen milk because it becomes lumpy when the cream separates.   If that is something that is of concern to your family, you can warm your milk up to body temperature (99-101 degrees approximately) and stir vigorously.  This will give it more of a fresh milk texture and help to remove those unappetizing lumps.  Frozen milk can be used to make cheese.


Tuesday, October 14, 2014

Where Have All the Farmers Gone?


Are farmers at risk of becoming extinct?  Possibly to some extent.  While there are many reasons for the decline in agriculture as the chosen profession for today's younger adults, the fact remains that we may very well see a time when the majority of our farmers pass on and there are not enough younger farmers to take their place.


According to the Start2Farm.gov, a service of the National Agricultural Library (USDA):

"“We have an aging farming population. If left unchecked, this could threaten our ability to produce the food we need – and also result in the loss of tens of thousands of acres of working lands that we rely on to clean our air and water.” – Secretary Vilsack, August 12 Opening Comments to the Drake Forum on America’s New Farmers.


The average age of a farmer today in America is 57 years of age. Five years ago it was 55. We have had an increase of 30% of the farmers over the age of 75 and a decrease in the number of farmers under the age of 25 by 20%."
This subject happens to be one close to my heart.  My husband, Mike is a third generation farmer, is 54 years old and I am 47 years old.  None of our children or any of our nieces and nephews have chosen to pursue farming as an occupation.  Unless some of our grandchildren develop a love of farming, then what has been lovingly nurtured and tended to for three generations at the Cupp Farm will be no more.  This breaks my heart.  Of course, we would never try to coerce our children or grandchildren into a career that they don't willingly choose for themselves, but I do feel there are things we can do as adults to help the children learn to appreciate their farming heritage.  This doesn't just apply to farming families.  We need to be educating all of the children in our country of the importance of farming.  We should do so  not in an effort to convert them to choosing farming as a career choice (although that would be an awesome benefit) but rather to insure that regardless of a child's chosen path, he/she learns to really appreciate and support the farmers that put food on their table.  At one time it was common to have a kitchen garden and a family milk cow.  Now most of the families in the United States rely on a farmer to provide their produce, milk, and meat.  So many times, children are so far removed from their food source, that they don't even make the connection.  Unfortunately, a lot of adults are similarly removed.  I will never forget a conversation with a lady almost old enough to be my mother, who stated she didn't want my farm fresh eggs because eggs from chickens were disgusting and she would rather buy her eggs in the store.  I just had to shake my head and wonder if she knew that the eggs in the store came from chickens as well.


I believe educating our children is the key to insuring that we continue to grow future farmers and equally important,  a society that supports those farmers.  And how do we do that?  I have a few ideas that I would like to share.
1.  Make everyday activities into educational opportunities:  Talk to children of all ages about where their food originates.  Having eggs for breakfast?  This is a great opportunity to talk about chickens and the farmers that care for them.  Making a salad for dinner?  This is a good time to discuss how things grow seasonally.  One can expand the conversation to fit the age of the child. Look for opportunities to discuss farming and agriculture as you travel in the car or watch a movie.  Any opportunity you can find to discuss agriculture with your children is a learning opportunity for them as well as a way for the two of you to connect on this important issue.  


2.  Grow something.  Anything.  Even if you don't have ground to grow a garden or access to a community garden, plant something simple in containers and let the children in your life help.  Let them see the progress as the plant grows and produces.  And, if what your planted ends up dying, use it as an opportunity to explain that many times farmers face crop failure.  Anyone who gardens, produces crops, or tends to animals is going to eventually have loss and failure.  In addition, empathy for the farmer who struggles and joy for the farmer when he is successful is a good lesson.  
3.  I am not one to advocate everyone trying their hand at raising livestock.  There are so many people who do not understand the level of expense and commitment it takes to raise their own livestock.  However, if you are up to the challenge and have done your homework, raising livestock is a great way for children to learn more about the agricultural lifestyle.  If raising animals is not the right choice for your family for whatever reason, then see if you can find a working farm with livestock for your child to visit.  (Please be considerate of the fact that not every farm has very expensive liability insurance it takes to welcome visitors and be respectful of the fact that not every farm can accommodate visitors for this reasons or simply because of their work load.  Consider it a privilege when you are able to visit a working farm and don't begrudge any cover charge for your visit as it helps to offset the expense of the insurance needed to provide the opportunity to the public.)


4.  Support your local farm stands produce auctions, and farmer's markets and take the children in your life along with you.  In this manner your are teaching your children to support local business, and to make healthy choices while they absorb the ongoing educational opportunities of being submersed in agricultural environment.


5.  Introduce your kids of all ages to books and literature that promotes farming.  Even the smallest of children love books of farm animals.  Read with them and discuss the things your read.  If you are unsure of something, then take the opportunity to research an agricultural subject together.
6.  Take your kids to the pumpkin patch, the local orchard, or the small family owned creamery if you have one locally.  Visiting the County or State Fair is a fun agricultural related field trip for the family.  (Make sure to visit the livestock and home preservation sections of the fair and discuss what you see!)  Some areas host Agricultural Field Days which can be a great conversation starter for you and your children.


7.  Get involved in a CSA (Community Supported Agriculture) program.  Don't just buy the products but talk to the children in your life about the products you receive and the work that was put into producing them.  Teach your children that we shouldn't take these things for granted and that someone worked very hard to provide this service to them.  
8.  Buy your milk from a local farmer if possible.  Depending on where you live and your personal preferences, you might be able to purchase raw milk or buy pasteurized milk from a small farm with a creamery.  Let your children help you make simple dairy products such as butter.


9.  Find blogs and Facebook pages on the internet that are age appropriate for the children in your life and share the pictures and stories with them.  A few to consider:  USDA for Kids, National Agriculture in the Classroom, My American Farm, National Agriculture in the Classroom, Education World, and others.   
10.  Get kids involved in agriculturally minded programs such as 4-H, Farm Based Education Programs, and  Farm to School among others.  
11.  Learn about food preservation, buy produce locally, and spend time together drying, canning or freezing summer garden goodness for future enjoyment.  A few links to help you get started:  National Center for Home Preservation, Ball Canning, and Canning Granny.  Here is a fairly simple and great starter project that I posted earlier on our blog for home canned grape juice.


My desire is that this blog entry will be an encouragement to all of us to support agriculture in every way that we can.  It may sound trite but No Farms/No Food is not just a nice bumper sticker but a reality.  It's up to all of us to see that our farms remain and that farming continues to be a career choice for our children.

Note:  Educating children about farm life is so important to me that I recently started a blog specifically for children.  I would love it if you would check it out and share it with the children in your life.  You can find T. Cupp's Junior Farm Friends at this link.  

Thursday, October 02, 2014

Preserving Grape Juice ~ An Old-Fashioned Method (Reviewed and Updated September 17, 2022)


If you have never tasted homemade grape juice, then you need to try it!  The old-fashioned method for canning grape juice is simple. One can put up a large batch of juice in a short amount of time.

This is a great activity in which to enlist the help of children to give them a "taste" of home preservation.  They will feel great pride in being a part of the process, especially when they are able to sample the juice and know their efforts helped produce it.

CAUTION:  Don't allow children to assist in the pouring of boiling water or in taking the jars in and out of the hot water bath canner.  These steps should be done only by a responsible adult.

Items needed:

Hot Water Bath Canner (Or pot large enough to hold jars covered with boiling water)
Rack for canner 
Quart Glass Jars produced specifically for canning (Jars not designated for canning can crack and break during processing.)
New lids (small or wide mouth depending on the size of your jars)
Metal Rings/bands to screw down on top of the lids
Sugar (optional)
Pot or Kettle to boil hot water
Old Kitchen Towels and cloths for cleaning up spills and to set the hot jars on once removed from the canner (Grapes/Grape Juice will stain, so it's best to use old cloths you don't mind getting soiled.)
Jar Lifter
Grapes (Approximately 5 pounds will make seven quarts if you use 2 cups of grapes per quart.)

If you are new to canning, here are a couple of good posts from other sites to help you familiarize yourself and get started:


1.  Wash and sterilize your glass jars.

2.  Fill your canner or pot with enough water to cover the jars when they are submerged and put them on the stove to begin heating.  (It takes a while to get that much water to a rolling boil if you are using a quart-sized hot water bath canner.  

3.  Fill your kettle or additional pot with water and heat to boiling.  (This water will be used to pour over the grapes in jars.  

The next few steps are fun for the children to get involved:

4.  Wash your grapes.  Hopefully, you can find grapes that have not been sprayed.  Either way, wash them well because spiders, spider webs, and bugs like to hide in the clusters  

5.  Remove grapes from stems.

6.  If you are using sugar (or other sweeteners) pour into the bottom of glass jars.  (Suggested amounts are 1/4 to 1/2 cup per quart.)  I do not sweeten my grape juice.  Sugar is not necessary for the preservation and is only added for taste.  Note:  You may see sugar in the bottom of your jar after you have processed the juice.  It sometimes takes several days for the sugar to dissolve in the jar.  

7.    Put 2 cups of grapes in each quart jar.  (Some recipes call for as little as 1 cup of grapes per jar, but we like our juice more concentrated.  One can always dilute the juice later by adding more water adjusting to individual taste.)

These next steps should be performed by an adult as children can easily get burned:

8.  Pour hot boiling water over the grapes (and sugar if you added it) filling to 1/4 of an inch from the top of the jar.  (Spacing is important when you are canning, so always follow the instructions regarding the fill line.)

9.  Carefully wipe the rims of your jars.  You don't want any juice, sugar, or debris on the rims as this could keep the lids from sealing properly.  

10.  Place your new lids on the jar.  (Follow the manufacturer's instructions for prepping lids.  It use to be that one was instructed to place the lids in hot water before putting them on the jars.  Recently, some of the manufacturers have changed the instructions for their lids, and boiling them in hot water first can actually cause them NOT to seal properly.  Each box of lids will have the individual manufacturer's instructions written on them.)

11.  Tighten down (finger tight) the bands/rings over the lids.

12.  Place your jars in the canner once the water has come to a boil.  Always be very careful as you work around the boiling water.  It's really easy to get burned.  The water should cover the tops of the jars.  You want them to process at a gentle boil.  

13.  Process for 15 minutes. (Some recipes call for processing as little as 5 minutes but I chose to process for the longest recommended time.)

14.  Carefully remove jars and place them on towels in a safe place where they will not get bumped, pulled from the counter/table by little hands, or burn someone while they are cooling.  As the jars begin to cool, you will hear the lids pinging.  It's always fun to enlist the help of the children to count the jars as they seal.  It's a great feeling to know they have all been sealed properly.  

15.  When the jars are cool and sealed, you should remove the rings.  Leaving rings on the jars sometimes causes them to rust and they can be very difficult or next to impossible to remove.  They are only needed temporarily until the lids have been sealed.  

16.  Wipe down your jars to remove any sticky residue, and label the lids if you like.  I always at least put the year the item was canned on the lid so that I can rotate my stock.   Storing your juice in a cool, dark place is the best way to preserve the quality of the product.  

17.  Allow your grape juice to set on the shelf for several weeks to a month before sampling.  Simply strain off the juice from the grapes, dilute if desired (or not if you like a stronger taste), and enjoy!  I actually drink the juice and then smash and pour water over the grapes that remain and get a bit more juice from them!  You could also use a cheesecloth or flour cloth and squeeze the grapes into the jar of juice or simply just eat the yummy grapes.  


Note:  This may seem complex and overwhelming if you are inexperienced with canning, but once you get into the swing of it, canning grape juice is actually quite simple and moves along rather quickly.  In my opinion, it's a great first-time project!

Monday, April 07, 2014

How Do I Train a Cow to Milk?


I am often asked if it's better to purchase a trained cow or buy a heifer calf to raise and train as a family milk cow.  It seems that most people are persuaded to get a cute little calf with the idea they can bond with it and then train it more easily.  While this is true on some levels, the process can be a lot more difficult and involved than what many family cow owners have considered.   Sometimes we tend to forget that animals are not human and while human/animal relationships can and are formed, bovines are bovines and process accordingly.  We rely on their instinctive nature to birth and nurture a calf, but we often times get frustrated with them when they don't understand what we are asking of them.  For this reason, I always recommend  to start out with a healthy, well trained family cow. Starting a home dairy is hard enough without adding the stress of teaching a newly freshened heifer how to be a milk cow.

With that said, there will be those who can't resist the chance to buy a cute little calf to raise.  Or, if one does buy an already trained cow, eventually that cow will have a heifer calf and your family might just want to keep her  to raise as a replacement or to provide additional milk.  Training a first calf heifer without some prior planning is probably not a good idea.

A lot of people like to halter and lead train their family cows.  In theory, this makes it easier to move the cow from place to place, to trailer the cow if necessary, and to direct the cow to the milking parlor and stanchion.  This blog post is not about halter breaking and lead training a cow.  To be honest, I do not halter or lead train my cows and have not had any issues in getting them to respond to me.  If you will find it necessary to move your cow across a busy road or through an area that is unfenced on a regular basis, then haltering and leading training would be beneficial.  Otherwise, with a good set up, it's not a requirement.  Knowing more about the nature of cows and how they think will help a person regardless if they halter and lead train or not.  An excellent chapter in the book ANIMALS MAKE US HUMAN by Dr. Temple Grandin explains the nature of bovines in detail and is a must read in my opinion.

So, let's assume that you have a cow that is not lead trained and you want to milk her.  Perhaps she is tame but even if she is not, most cows can be lured into a stanchion with treats.  For most people this would be grain but for those who choose not to use grain with their cows, it could be a piece of hay or some alfalfa pellets.  It won't take but a few times for most cows to understand that their treat is waiting for them in the stanchion.  (And that brings up an important point.  There are some cows that can be milked without a stanchion but most cows require a headgate to secure them and bars on either side to keep them from swaying . ***** Don't have stars in your eyes and your head in the clouds and assume that your sweet cow is just going to stand in the field and let you milk her.****  While this is true of some cows, it's not true of most.  Most require a restraint of some sort just to provide them with boundaries of what is acceptable and what is not.)  There are some cows who may completely refuse to go into a stanchion if they have not previously been in one.  This is why it's advantageous to begin even before the baby is born to acclimate the cow to the stanchion  and begin familiarizing her with the process. If your cow is not lead trained and can't be lured, then you will have to drive the cow into the stanchion.  This is sometimes easier said than done and often requires at least two people, especially if the cow has not been handled a lot.   (On a side note, bovines will fall into a routine within a few days.   If you have other cows to milk, the heifer in training can be a nuisance wanting in for their treats while you are trying to milk the others.I also advise to only offer treats or grain in the stanchion and not in the field.  Otherwise, you can create a monster that approaches you quickly and aggressively in the open field looking for a handout.  This can be dangerous and is not advisable.)

Getting the cow into the stanchion and comfortable can sometimes be the easy part.  Many times a cow does not want her udder handled.  She instinctively knows that part of her anatomy provides for the baby and she is protective.  If you are able to touch the cow's udder and let her familiarize herself with your touch before the calf is born, this is good.  Word of caution:  Do not actually milk the cow before she gives birth.  Just touch her udder and her teats and let her learn to trust you.  She may kick at first,  so be careful.

If you are fortunate enough to have your heifer trained to come into the stanchion and tolerate your touch before she calves, you are miles ahead of the game.  However, once the calf is born, the heifer's body will be under the influence of some powerful hormones making her extremely maternal and protective.  Your sweet, compliant cow may be a beast you don't recognize.  BE CAREFUL.  Even if you think she is completely trustworthy, be smart and very aware as you handle her and the calf.

I personally allow the mother and calf to bond and don't try to milk her for the first 12 hours after the calf is born.  The calf gets as much colostrum as he wants during that time.  After 12 hours I bring the cow in to the milking parlor to be milked.  I personally DO NOT bring the calves into the milking parlor, although there are a number of homesteaders who do.  They bring the calf to keep the cow happy and they sometimes use the calf to get the momma cow to let down her milk.  This post is written with the assumption that you are milking the cow separate from the calf.  At first the cow may be hesitant to leave her calf but she will learn with time that the calf is fine there without her.  (I am also writing this on the assumption that the reader is leaving cow and calf together and not taking the calf away to bottle feed.)

At this point the cow's udder is very tender and often very swollen.  Remember that it's just a normal reaction for them to kick at something that is uncomfortable to them.  Wash the udder gently.  I use barn towels and a solution of iodine.  Some people use just water or water and vinegar.  If you are hand milking, you have the advantage of a quiet environment.  If you are machine milking, it's actually important to expose the heifer to the sound of the machine as she is in the stanchion prior to milking her for the first time.  If you have not done this, the first time she hears the vacuum pump start it will be an additional fear for her.

We personally always try to milk without using restraining devices on  the heifer/cow.  We don't want them to get use to being restrained in order to be milked (aside from the boundaries provided by the headgate and stanchion bars). Training them from the beginning that kicking isn't acceptable is our goal.  However, if one is a novice, afraid, or it is evident that the heifer is going to be uncontrollable, then one would want to use some method of restraint.  There are several ways a cow can be restrained.  There are several different types of anti kick devices like the Kick Stop and the Kow Kant Kick, hobbles, or even a rope used properly can work. Do be careful using restraining devices.  If used improperly, they can cause injury to both the cow and the individual milking the cow.  Always remember to remove the restraint when you are finished milking.  This may sound evident, but it's not uncommon to forget this step and cows can be injured when turned out with restraining devices still in place.

 If you have two people available, you can also do what is called "tailing" a cow.  One person simply stands directly behind the heifer/cow and holds her tail straight up firmly where the tail and rump meet.  When held straight up, theoretically, the cow can't kick.  My husband and I actually use this method quite often the first time we milk a heifer if it is evident that she is going to kick.  (Warning:  Heifers are nervous and will often poop and pee while in the stanchion the first few times.  If you are tailing a cow, you will end up very dirty.)  While this method works in most cases, if done incorrectly it can be dangerous.  It is best if you can get an experienced individual to show you how to tail a cow and then let you try it with help.

Try to stay calm, no matter what happens when you are milking a first calf heifer.  She will pick up on your fears, anger, frustration, etc.  Be sure to praise her when she does what you want her to do.  Speak gently and firmly to her.  Explain what you want.  She will learn key phrases over time.  On the other hand, don't be afraid to use your voice to let her know when she does something you find unacceptable.  If she kicks, loudly yell at her "No".  I find that cows will either kick at the machine/hand that is milking them (a perfectly normal reaction.  Think about if you just had a baby and someone restrained you and tried to take milk away from your baby.  You would kick as well, whether out of fear, anger or because you were sore and uncomfortable.)  or, if you have a more aggressive cow, she may kick fast and hard at your body.  These are the cows I consider more dangerous.  A cow can have unbelievable good aim and strike with great force causing serious injury.  A balance between being cautious while not being fearful is of great importance.

My way of training a newly freshened first calf heifer is not the only way, but it is the way that works for me.  I believe strongly in allowing the cattle to be cattle and live as naturally as possible.  They raise their own calves, graze, live in a herd setting, are bred by a bull and even my training methods for milking are gentle and as carefree as possible.  I have found that familiarity, gentleness and consistency are far greater teachers than ropes and halters at least for our farm.  Restraint is used when necessary to protect us from a cow that is kicking dangerously but those restraints are used as a last resort and discontinued once the cow is no longer a danger to the person milking.  On a side note, it has been interesting to observe over the years that my cows who were my biggest pets were usually the most difficult in the stanchion in the beginning, while those who were still a bit shy seemed to be more compliant once they learned that a treat was available for them in the milking parlor.

The information in this post is by no means exhaustive but perhaps it will be a starting point for those contemplating milking a first calf heifer for the first time.

Happy Milking!


Wednesday, March 26, 2014

Better Late Than Never! (Why Doesn't My Cow Calve?)


Humans often get worried when babies aren't born when they think they should be born, and sometimes there are some reasons for concern.  However, often, the time simply isn't right for the calf and the cow.  We try to let nature take it's course here at the farm.  That is why we prefer our cows to be pasture bred rather than artificially inseminated.  We also prefer to not use any types of hormones or antibiotics unless they are deemed absolutely necessary.  Inducing a cow that is "late" is not something that we do.  Don't get me wrong.  If there were some type of life threatening condition that warranted such, then we would do what was necessary but too often we as humans try to take matters into our own hands rather than just letting nature take it's course.

One issue that comes up when a cow does not calve on schedule is the question of if the cow is actually bred.  This is a valid question and for beginners who aren't able to palpate or "bump" a calf to determine if the cow is bred, it is always wise to have your local Vet come out and verify that the cow is indeed bred.  This is especially important if you don't have a bull that runs with your herd.  A cow that was simply exposed to a bull once could very well not be bred.  If your cow has been in with a bull for many months, it is likely that she is bred, but sometimes there are other issues that cause a cow to not conceive.  Making sure the cows is indeed bred is important.

In our case, we have a cow that was put in with the bull when she cycled and her due date was set for March 5th.  Her due date arrived and I told my husband that she didn't look anywhere near ready to calve.  I decided then that she was either late or hadn't bred on that initial cycle when she was serviced by the bull.  We waited and counted the days, watching her carefully for signs of change.  Exactly 21 days from what we thought was her initial due date, she gave birth to a healthy bull calf without any assistance from the farmers.  We know now that she was indeed bred on her second cycle after she was put in with the bull.

We welcome Princess' healthy calf to the world on this cold, windy, snowy, spring day.

Good job Momma Cow!